Way back when, our daughter kept telling us not to leave a bunch of stuff for her to get rid of. (Like when we're dead and gone and she has to clean out the house.)
We listened to her. Several years ago we sold our big two-story house and moved into a small two bedroom manufactured home in a retirement community. Got rid of couches and sofas and chairs. Coffee tables and end tables and lamps. TVs and a double digit number of bookcases. Desks and printers and computers and office supplies. Teaching materials. Camping equipment and Christmas decorations. Dressers and oh-so-many clothes. And much more stuff we haven't yet missed.
We thought we had done pretty darn good. Once we were settled into this new place we had room for everything. No storage unit needed, no boxes of junk thrown in closets. It all fit just fine. But then I started looking around and realized we still had too much stuff. So these past two years I've been working on getting rid even more things.
Thus the Friday 15 was born.
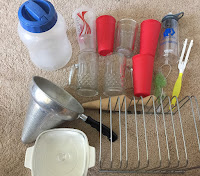
Every week I made it a goal to get rid of 15 items by Friday. Between the things I took photos of and the things I didn't, over the course of two years I've gotten rid of 2,000+ things. (How is that even possible?!) The Idaho Youth Ranch Thrift Store was the recipient of most of the donations, with the garbage and recycling bins getting another chunk. I sold a slew of things on eBay and a few items even made their way into our daughter's house.
Thanks to the Friday 15 I now have empty drawers in the bathroom, empty cabinets in the kitchen, and empty shelves in the closets. It's a nice feeling. It's allowed us to live my
collect moments, not things mantra.
Letting go of the stuff has lightened our loads and cleared our minds. As embarrassing as it may be to show some of my discarded stuff off to the world, I'm okay with it. The end result is so worth it. While I'll never be done-done, I'm as close as I'm going to get for a while.
If you're ready to consider downsizing your own life and want to explore more about the how and why, check out The Minimalists. Life changing.
Downsizing in 2019
Downsizing in 2018


 |
| emptied my computer trash |


Goodbye junk. Goodbye Friday 15. Goodbye 2019.